Adventures In Paper Cutting

1 Comment

As I mentioned in my last post, we have a very small house. Our dining room is actually the front half of our living room, divided only by the couch. We really only have one actual wall in the dining room (there is a little partial wall, too, and cabinet on the other main wall) and it was bare. I hated looking at it. So, something needed to be done. I thought about framing pictures of the kids for the wall, but then started seeing some fabulous silhouettes and was inspired!

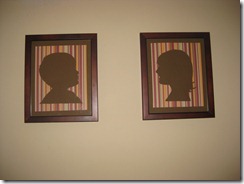
As our house is decorated in “fall” colors, I decided not to do the traditional black silhouettes. Instead, I chose a chocolate brown. I purchased a few sheets of thick scrapbooking paper and a coordinating stripe. Then, I stood my children against a closet door and took numerous pictures of them. I figured out which I liked best, printed them in black and white, used a pencil to outline the actual part of the photo I wanted to use and used that as my pattern for cutting.

I taped the printed picture to the scrapbooking paper to hold it steady. I used an Exacto knife on my cutting mat and slowly and carefully trimmed around each of the pictures. When I was done, I used photo mounting tape to attach the silhouettes to the backing that had been cut to fit my chosen frame. I then decided to cut mats from another sheet of the brown paper. This was actually the biggest challenge for me and I had to do it twice to get it right! Then I got it mounted and had my husband hang them. I LOVE them!

003 I mounted them facing each other.

004

My daughter.

005

My son.

I have since contemplated finding a side view of Santa and Mrs. Claus and making silhouettes of them as Christmas decorations! I was thinking green for the silhouettes and a pattern Christmas paper underneath? I just don’t know if my husband would go for that, though! 🙂

Fall Is Here!

1 Comment

Fall is finally here! I LOVE fall! I love the colors, the scents, the cool, crisp air. All of it is so comforting and cozy for me. Although we had a run of near 90 degree temps leading up to fall, the weather finally seems to have changed, it has cooled off, windows can now be opened and leaves are starting to turn. And, when fall starts to make an appearance, I also get the urge to start crafting! I have already shown you some of the sewing I did earlier. But, as I mentioned in that post, the fabric I used was actually just scrap fabric from another project!

I am in a book club with some awesome women! And I finally got to host! Eek! My first thought – what do I need to make or do to make my house feel cozier? Knowing that I had about a month really got me moving. Our house actually works well with fall colors. We have lots of oranges, teals, reds, and browns already, so adding some fall colors with fabrics would not only help transition us to fall, but would actually work well all year long. I had to decide just where to focus my crafting on, though. And the dining room table, where we will gather for our book club, was my first focus.

I knew I needed something on my table. I thought about just getting a vase of fall flowers for the center, but that wasn’t quite enough. I thought about a table cloth, but those are more of a pain for me than they are worth it. Then I decided on a table runner. But I didn’t a long table runner. I wanted something more for the center of the table. I looked on websites, but couldn’t really find what I wanted. So, why not do what I do best? Sew one!

Once I found the right fabric, it came together quickly and easily. I decided to quilt one. Now, I am not a quilter. I pretty much fly by the seat of my pants when it comes to quilting. I searched for a pattern online for a table runner, but just couldn’t find what I wanted. So, I made it up! I found the description for a disappearing nine-patch and used that. I added the white border (it actually has a pattern to it, but it is hard to see) to get it to the size I wanted. Each of the three blocks are different, but all use the same fabrics. I quilted it on my machine (although I am not very good at that part yet. But I have wrist issues, so I don’t know if I could really manage to do hand quilting) and even made my own binding! Here it is!

IMG_0090 Two of the three blocks.

IMG_0095

Showing the backing.

IMG_0101

A better view of the binding.

And, along with the table runner, I also made some quick and easy floral wire pumpkins. I used the tutorial from a guest blogger on Someday Crafts for the wire pumpkins. I bought rolls of brown floral wire at Michael’s and cut them into pieces, then followed the directions. I do wish I had more wire (I may get another roll or two – they were not every expensive) to fill them out even more. I made a total of three – two smaller ones for the table and a larger one for the entry. The two smaller look so nice on the table runner! And, with the addition of some flowers in fall colors, the table is perfect!

The finished table runner with accessories!

A close up of one of the smaller pumpkins.

The pumpkin in the entryway. (You can see how the rings sort of slant. I think that is because there aren’t enough rings.)

Our house is tiny and needs a lot of work done, but it amazes me how a few simple projects can make the house feel so much warmer and homier. Stay tuned for one more project I did for the dining room! It is one of my favorites!

Variations On A Theme

Leave a comment

Sometimes, when I find a fabric, I fall in love. And I want to use it – a lot! Recently, I fell in love with a collection of fabrics. I have had such fun creating with a collection of coordinating fabrics in colors and patterns I love!

I visited Amish country on Labor Day with my mom and sister. I knew there was a nice fabric shop there, so I made sure we went in. With some help from my mom and sister, I was able to find a collection of fat quarters (each about 18″ x 22″ – also defined as a quarter of a yard of fabric if a yard is rolled out and cut into four equal sections) in coordinating prints from Moda Fabrics. The collection is called “Saltbox Harvest” from Deb Strain.

saltbox

First up, I needed a camera case. My poor camera was usually thrown in my purse with no protection. The lens was fine, but everything else was dusty and getting scratched. I felt bad, especially since I LOVE my little point and shoot and it wasn’t exactly cheap! I had found a tutorial on Crafster.com to make a simple camera case and decided to follow it – sort of.  I simply made a long rectangle of fabric that would wrap all the way around the camera, including a flap, then seam it on both sides. I cut another rectangle of the lining fabric, sewed it up, then sewed them together. I included a ribbon closer (I could have done velcro, but liked the button) and sewed a button hole so the wrist strap of the camera could come through. It worked great! I used one of the fabrics from a set of fat quarters I had purchased and lined it with a coordinating piece of flannel for a bit more padding. Here it is!

IMG_0020

The closed case. (Sorry for the shadow!)

IMG_0024

Opened, with the camera in it.

IMG_0026

Without the camera so you can see the buttonhole.

I love how this turned out and it is nice and lightweight, so it doesn’t cause my purse to feel super bulky! If I make another, the only thing I would do differently is to round the corners of the flap a bit.

Next up was my iPhone case. I had an iPod Touch for a long time, until it met with an untimely accident in a glass of water. So, last week, we decided to upgrade to iPhones. I wanted a case for it, especially for rides in my purse. I looked at lots of cases online, trying to find just what I wanted. I finally saw the iPhone Carry Case from Heartofmary. She offers an eBook with directions to make the case. It is simple and easy to follow and I love the result! I love that I can clip this to my belt loop or my purse or use a lanyard to wear it around my neck and it also includes a pocket to hold your ear buds or any cords you may want to carry with you. It is also not very bulky, even though it is lined with fusible fleece. I even have a protective plastic outer case for my iPhone that snaps onto it and it still fits inside. And, I love the fabric!

006 With my iPhone peeking out (this was before I put the case on.)

005

The pocket on the back.

008

The inside of the case.

001

The case with the iPhone inside, fastened up.

Now, honestly, each of these cases took minimal scraps of fabric to make. And this was not why I really bought this fabric! But I will save the real reason I bought the fabric for another post! Stay tuned!!!

Fiber Festival Fun!

1 Comment

About 4 years ago, my husband and I visited our first fiber festival. I was hooked! I have been to several, but have a favorite – A Wool Gathering. A Wool Gathering is held in September at Young’s Jersey Dairy in Yellow Springs, OH (about half an hour from Dayton or an hour from Columbus.)

For those unfamiliar with fiber festivals, I will try to explain A Wool Gathering. This year, there were three huge tents set up. Each tent was lined with vendors – some are yarn shops, some are dyers, some spinners, some selling yarn, some selling felting materials, some with fleece, and any other vendor associated with spinning, dying, knitting and crocheting. They even sell buttons, beads, stuffed animals and already made goods. There is also a row of vendors outside the tents with much of the same. Down the middle of the tents are often filled with spinning and weaving demos, along with spinning wheels you can try out or purchase. And, occasionally, there are animals! There were bunnies and alpaca inside the tents this year. There is another tent outside filled with different breeds of sheep and half of it is used to give sheeping shearing demos. And finally, in a fenced area, they have a gentleman that brings his dogs and ducks and the dogs do demonstrations by herding the ducks into a baby pool.

I could probably spend most of a day at the fiber festival! But, thanks to warm temperatures which are all the warmer inside the tents and a husband who isn’t very interested in fiber festivals, I can usually limit my time to about 2 hours. And we won’t even mention the financial aspect! But, I save up my money each year to go, so I am prepared!

So, what did I bring home? Lots of stuff to spin! While I love yarn, it can be difficult for me to figure out what kind of project I might use it for, leaving me with too little yarn when I get home to make it worth the price. So, I stick with roving. This year I bought several fabulous blends!

These two are from Valhalla Acres. The red/orange blend also has some blue and yellow mixed. I can’t wait to see what this one will look like once spun! This is 4 ozs of 100% wool from a Blue Faced Leicester/Border Leicester cross. The grey/white is 4 ozs of a super soft blend of 40% alpaca, 40% wool and 20% angora. They had some of this spun up in the booth and it is mostly dark with some white showing through, which is what I had hoped.

This lovely stuff is a lovely, soft white alpaca roving from Tryphon Farm Alpacas. I bought 4 ounces. It is SO SOFT! I have some alpaca, but I have not been altogether successful with spinning it because it is not in roving form. I am hoping to spin this up, then move to the other fiber once I get the feel for alpaca.

These three balls of fluff are each an ounce of beautiful BFL/angora blend – a 70/40 blend, I believe. Unfortunately, I was not given any identifying information as to the seller, so I can give them credit where it is due! I love petting this stuff, as do my kids!

This fiber is from one of my favorite booths at the festival. Bullen’s Wullens has some of the best fibers out there! The colors are gorgeous and the fibers spin almost effortlessly. I have purchased from them for the last three years now and always search them out. I didn’t get to see Pat, the owner, this weekend, but have met her in the past and she is wonderful! In fact, last year, she even gave me a spindle made of a CD to learn spindle spinning on and showed me how to do it! Both are 4 ozs. The blue is a 70/30 blend of BFL and Tussah silk (talk about YUMMY!!!) and the red is a 50/25/25 blend of Merino wool, tussah silk and bamboo. Their fibers are always a huge joy to spin up!

And finally, although I tend to prefer spinning fiber, I had to get some sock yarn! This is a gorgeous hand dyed fingering weight yarn in oranges, browns, reds, black and green sprinkled over the base color. This is 510 yds of superwash merino yarn (plenty for a pair of socks!) in Benin colorway. I think I purchased some spinning fiber from this same seller last year. Creatively Dyed Yarns is the name and all of her hand dyed yarns and fibers are gorgeous! I had a very hard time choosing just one!

The weather was gorgeous, I had my husband along to hold my bags and to chat with and the fiber was abundant! It was great day at the fiber festival! I highly recommend, if you are interested in the fiber arts at all (spinning, weaving, knitting, felting, crochet, etc.) that you try to visit a local fiber festival!
A Visit From The Tooth Fairy!

Leave a comment

When you have a six year old in the house, you can expect some exciting milestones. Things like the move from kindergarten to first grade, learning to read and losing baby teeth are all such exciting steps towards being a big kid!

For the last 9 months or so, my daughter has agonized over the fact that her baby teeth didn’t seem to be budging. She constantly asked when she was going to lose a tooth. Her friends at school were starting to have wiggly teeth and even lose them. One of her favorite cartoons even dealt with loose teeth. I think she had lost all hope that she would ever shed those baby teeth.

And then, about a month ago, she said her tooth felt funny. I looked at it, thinking maybe she had some food stuck in it (it was right after breakfast) and that was when we made the great discovery – a wiggly tooth!!! Oh, she was overjoyed! And I, being a crafty person, decided that I had to make something for the occasion.

Now, we know that tooth may hang on for months, but I wanted to get started, just in case. I had seen numerous examples of tooth fairy pillows online. Some were simply small pillows with pockets, others were cute little fairies or even teeth, and some hung on the doorknobs, saving the Tooth Fairy the hassle of reaching under a sleeping child to collect a tooth and leave a treat. My favorite came from Mmmcrafts. I encourage you to click on the link and see the cuteness there! And, she offered a free pattern, too!

The actual pillow came together quickly. A bit of planning, a bit of cutting, some gluing and stitching and I had a cute pillow, perfect for my girl’s teeth! See, isn’t it sweet? (And it isn’t completely done yet – I need some thin pink ribbon for the shoes since she is a ballerina! I need to get to the craft store for those soon.)

This pillow is made mostly of craft felt. I used some stiff felt for the wings, then simply coated them with glitter glue, so they actually sparkle. I had a bit of lace I used for the skirt and some ribbon in my stash served as the door hanger. Thankfully, with my huge felt stash, I was able to craft this tooth fairy pillow for free! What a deal!

That tooth is still holding on. The adult tooth is starting to come through behind it, so I am guessing it’s days are numbered. My daughter has yet to see or even know about this pillow, as I plan to save it for the day she loses the tooth. And I am already planning on a boy version for my son, even though it may be another 2+ years until he loses his first tooth!

Oh, and one more thing. A few weeks ago, another blogger, Tiffany over at Simply Modern Mom, introduced me to a new website called Pinterest. She offered a few invitations to join and I got one. I LOVE it! It is a great way to organize all of your bookmarks in a visual way, and you can share those bookmarks with others, too. I have made good use of it, organizing my bookmarks for all of the great crafts I want to try, the tutorials I have seen and just great ideas I want to reference in the future. There is a button for your Bookmarks Toolbar to make it easy to add a “pin”, you can choose from any picture on the page to represent your pin, plus you can see other people’s pins, like them or even repin them to your pin board. It is a great sharing tool and so much fun to use! And so much better than searching your bookmarks for specific entries! It is still in beta testing, so you can either sign up for an account (no idea how long it will last) or you can be invited to join. I currently have 4 invitations, so if you are interested, please let me know! I would love to have more crafty minded friends using the site!

Why I Could Use A New Serger!

1 Comment

Sew! Mama! Sew! is running a contest on their blog to win a new serger. I thought I would enter, so here is my entry!

When my daughter was small, I started using cloth diapers. I loved all of the cute diapers out there, but couldn’t afford the prices charged by the WAHMs (work at home moms.) Since I had dabbled in sewing a bit, I decided to try making them myself. Each diaper was cut, sewn, then turned and top-stitched. I dreamed of a day when I could own a serger to make it so much faster and easier.

A year or so later, my dad gifted me with some money. I immediately jumped on eBay and found a used serger, bought it and waited for it to be shipped. Now, this was not a new serger by any means. I think it may have been originally purchased in the 80’s. I was so excited to finally receive it! I opened the box and was assaulted by an overwhelming scent of the most horrible potpourri I have ever smelled! My husband has issues with smells, so before I could set the serger up in the sewing room/office, I had to let it sit outside  to air out!

Once I was finally able to stand the smell, I lifted the serger out and noticed the piece on the back that holds the thread was broken. I am sure it happened in shipping, so I didn’t complain. Besides, I hardly paid anything for it so I couldn’t complain!

I set the serger up, managed to figure out how to thread it (there was no instruction manual) and started sewing. It worked! But the thread holder kept falling over on me as I sewed, which was inconvenient to say the least. I immediately put it to use, sewing diapers for my daughter – and then for my son when he came along. My serger saw some good days, but those days were frustrating. I can’t figure out how to go from 4 threads to three, I don’t have any other feet for the serger and it has proven hard to find parts that fit since it is no longer made. The serger used to be white or off white, but it was a lovely yellow when I got it. And the sewing room/office still has a slight potpourri odor about it thanks to the presence of my old White serger.

Both kids have potty trained and diapers have been retired. And unfortunately, because of the quality and the issues with running a serger without a manual and with a thread rack that keeps falling over, the serger has been retired, too. All of my seams fray and things that could use an overlock stitch are instead turned and top-stitched. I dream of the day I can have a serger that works, has a manual and parts to compliment it, and doesn’t smell up the office!  Maybe one day!

New Bling

1 Comment

I love crafty blogs! I currently have 70 blogs on my RSS feed and 65 of those are craft related! They are where I get my inspiration, ideas and often instructions on how to do some of the things I attempt. Honestly, craft blogs are dangerous for me!

It was a craft blog, One Pretty Thing, that led me to another blog, Helping Little Hands, where I discovered stamped washer necklaces. I was immediately in love with the simplicity of these beauties, not to mention the fact that ever single item used can be procured in a home improvement store!

The first thing I did was order a set of alphabet stamps from Harborfreight.com. I was so surprised to see how inexpensive these were! I was hoping to go for the set I linked to, but they were on overstock. I ended up paying a bit more for the 40 piece set. For under $20, though, it was a great investment!

Next I headed to Lowe’s. I went on the trip with my kids and without the husband! I had fun wandering. I bought several sizes of washers and even found some ball chains (in with the chains) and the ends that fasten them (in with the ceiling fans.) I left feeling quite proud of the fact that I navigated the store and found items spread all over without needing any help!

And then the fun started! I should have taken pictures of the during, but I was having too much fun! I took my self-healing cutting mat out on the front step and put my washer down and started pounding! I found that a heavier hammer works better. The larger washers are also thicker and give a better impression. The thinner, smaller washers (like those I used for the kids’ below) tended to bend when struck. I bought extra washers and I am glad I did, since I messed several up. I am still not pleased with my daughter’s washer and may end up redoing it.

This is my daughter’s. As you can see, I messed up on the E and some of the letters weren’t very deep. After I was finished, I used a piece of wire to add the bead and hang it from the necklace. The bead chain is too heavy, so I need something smaller, but this works for now.

My son’s was next. I was able to get the letters deeper and clearer. I just hung his straight on the chain and it is so darn cute around his neck! He loves having his own necklace he can wear!

And this is mine! I love it! This washer was only slightly bigger in diameter, but it was much thicker and easier to get a good impression. I strung the bead using wire, which I used to hang it off the chain. This helps it hang straight when I am wearing it.

Again, the chain is a bit too thick, so I need to see what I can find elsewhere. Lowe’s didn’t offer much in that department, but they aren’t exactly a store that supplies jewelry making needs! I think these will make great gifts in the future. I have also seen them made into keychains (the thicker washers would definitely need to be used for those) and I am also planning to look for small rectangles or other shapes of metal that can go on necklaces. These are so darn easy and fun! And I love having the personalized jewelry!

School’s Out!!

1 Comment

Summer is in full swing here in the Momknitter household! Of course, it was a rough start. The last day of school for the eldest also coincided with an onset of strep for me! And then the antibiotics decided to mess with me, too! So, even with our 90 degree temperatures, I haven’t really enjoyed much of this summer until this week.

First, though, let’s back up a bit. I realize it has been a while since I posted. I haven’t been feeling particularly crafty lately, but when it came to the end of the school year, I knew I had to make something for the teacher! My daughter’s kindergarten teacher was a real angel. She was amazing and we had to let her know. My first thought was to sew her a tote bag. And then I thought we could personalize it somehow. And I decided to get my daughter involved since she likes drawing. So, I had her draw a picture of her teacher and then I transferred it over to fabric and embroidered it on, then sewed the patch into a tote bag. It ended up being a lot of fun and I think I want to do something similar later on, perhaps as gifts for the grandparents. We picked up a pack of fat quarters from JoAnn’s and I put together a patchwork strip with the picture in the front. This is the result (and remember, you can click on the pictures to make them larger!):

I love the fabric for the patchwork! There are fairies!!

A close-up of the picture! (Sorry it is so wrinkly – I really did iron it!)

Even with sewing the tote bag, my eye was drawn to other ideas all over the blogs I read and I found something else I wanted to do for the teacher. There is an awesome website called Wordle that allows you to make a list of words, pick a color scheme and it will arrange them for you in interesting ways. I made a list of all of the attributes I could think of for a kindergarten teacher, and especially my daughter’s teacher and put them in a list. I also added her name, the school, the class and the year. I picked the colors I wanted in the picture and played with it until I liked the layout. Then we printed it on cardstock. I assisted with a field trip for my daughter’s class a few days before end of the year and had the kids sign a mat to go around the picture. In hind-site,  I wish I had a silver pen, but the black worked OK on the dark blue mat. I framed it all and it was an easy gift that the teacher really loved.

If you decide to play with Wordle, I will offer a few tips. When you make your list, copy and paste it in another place, like a Word document. If you go leave your first creation, it will erase your list and you will have to start over. Also, the more you enter the words, the larger they will appear. I think I entered her name 4 times. The smallest words were entered once. I chose some to be larger than others. If you don’t like the initial layout, keep playing. Under the “Layout” tab, you can choose to re-layout with the current settings. This just reorganizes the words. You can also choose new colors and you aren’t limited to the options they provide.

The teacher loved her gifts and I am happy with the way they turned out. And I can’t believe my little girl will be in first grade in just a few months! And I don’t even want to discuss the fact that my son will be starting preschool!!

A BIG Project Finally Finished!!

2 Comments

Back when I was planning for Christmas, I got it in my head that I would make each of my kids a quilt. Now, keep in mind, my previous foray into quilting was a small rag quilt and some patchwork baskets. I had read about quilting, but never had any lessons on how to do it. I had read about quilt patterns, picking fabrics and the “quilt sandwich”, but beyond that, I was on my own!

My daughter’s quilt actually came together quite easily at first. I had purchased a ton of flannel for her as a baby since I used it to make diapers. I had a lot leftover and I started gathering fabrics I thought would work well together. I played with the fabric until I finally decided to do a pinwheel type pattern. Now, for any quilters out there, I will warn you now that I didn’t use any particular pattern, so any resemblance to a “real” quilt pattern is completely incidental! I had to get a few more fabrics to finish the quilt, but I had a lot of fun picking those fabrics out! I was worried at first that the patterns would clash or look bad together, but, as I pieced and played, I realized that I really liked the way they turned out and I lost a lot of fear of patterns and picking fabrics! I did stick with flannel, since that is what I had started with. I am not sure it was the easiest way to go since it made sewing a bit more difficult with the extra weight, but the end result was wonderful!
The quilt top. Lots of pink and flowers!

After putting together the top, I went to the bottom. I had seen several quilts where the solid bottom was put together with a strip of fabric squares. I decided to do the same thing, especially since I needed just a bit more length. I love the way it looks!

The strip on the bottom. You can also see my quilting job.

The hardest part was the quilting. I don’t have a free motion foot for my machine, yet I didn’t have the patience or the time to hand quilt (remember, I was hoping to have this done for Christmas!) I decided to just have fun and do some wavy lines. They don’t look fabulous or anything, but they work for a little girl’s quilt. Moving that quilt around as I sewed was not easy! And I was glad I wasn’t trying this in the middle of summer either!

After quilting it, I really got stuck. I put it down and started on a quilt for my son. I currently have the quilt “sandwich” made and it is waiting to be quilted. Obviously, these didn’t get done in time for Christmas! I suddenly had developed a mental block and it was all from one thing: the binding!  I was scared to death of the binding! I didn’t know what fabric to choose, I was scared of not cutting it straight and messing it all up, I had no idea how wide to make it. It was terrible! And then I ventured to JoAnn’s and found premade blanket binding! Yes, I know it may be considered cheating by some, but it helped me break through that blockade! It isn’t flannel, but it works well for the blanket. Once I bought it and sat down to sew it on, it went on fast! I sewed it on to the first side with the machine, then decided to hand sew, using a slip stitch, to sew it to the bottom. My mitered corners left a bit to be desired but I got at least one good one!

A mitered corner!!

I finally finished the quilt tonight! Thankfully, my daughter adores it. In fact, she, her daddy and her brother were all cuddled under it before bed while watching a DVD together! I can’t recall the exact dimensions, but it almost completely covers the top of our CA King bed. I wanted to make sure it was big enough for her to get use of it as she grew. I am proud of my first effort. I think I may invest in a free motion foot within the next year. And most of all, I am happy she likes it! She doesn’t care if the quilting sucks or if the miters are perfect!

The finished quilt!

Being enjoyed by its’ new owner (and her brother!)

Kid Room Redo

2 Comments

In November, my baby boy turned 3. I knew that I had to accept the fact that, while he will always be MY baby, he was no longer A baby. Up to that point, he had a room I loved – it had a wild animals theme with soft yellow, sage green and tan and his walls were a gorgeous brownish-orange (a color called Copper Penny.) I simply adored the warmth and gentleness I felt in his room, even when it was scattered with toys and crowded with his train table, bookcase and toy box (all fairly recent additions.)

Starting a month or so before his birthday, I started to ask his opinion on what kind of room he wanted. He wavered for a while between Cars and Thomas the Train – either of which would have been fine with me. He finally settled on Cars. I started to go into planning mode. The first thing I knew had to change was the wall color. Since the color in there was already rather dark, I knew we would be OK painting the walls red. We chose the Disney paint from Behr called Code Red. Wow! His room is RED! (This picture was taken by my son one day while I was trying to keep him busy by letting him use my camera! The color is a bit more on the orange side, which you will see in other pictures.)

My husband made the toy box for him and I painted it dark blue and we used Cars stickers all over it to decorate it.  Unfortunately, I don’t currently have pictures of it.

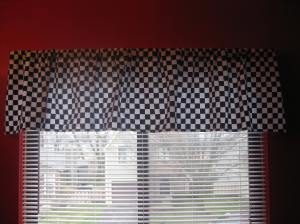
For curtains, I made a trip to the fabric store and got black and white checks. I made a simple valance. I love the look it gave the window! I had fabric leftover, so I cut them into triangles, stenciled his name on in red fabric paint, then used a zigzag stitch to attach another triangle to the back. I used blanket binding I bought at JoAnn’s to connect them all and hung them on his wall with quilt tacks. The bunting was great since it took up quite a bit of room on one empty wall (I think it is nearly 3 yds in total length.)

The valance.

The bunting (well, part of it!)

I also added some pillow cases to the room. Now, these don’t fit the Cars theme, but they made my son so very happy. He LOVES dogs so we use a lot of puppy patterned flannel. I am currently making him a quilt with puppy patterned fabric, so I used scraps to make a cover for a small pillow and his body pillow. He is thrilled with the result and so am I!

His puppydog patchwork pillowcase.

The body pillow case, already in use by my guy!

While I don’t have pictures, we also accented his room with a Cars poster and two road signs I found at Hobby Lobby – a speed limit sign and a stop sign. I am also hoping to add a personalized street sign to the wall for his birthday.

While I miss his nursery terribly, this room fits my guy and his personality so darn well! He is so happy with it and so am I!

Older Entries Newer Entries